

AMCO’s guide to hitching and operating a ditcher
With spring (and spring rain) on the way, now is the perfect time to brush up on correctly hitching and operating AMCO’s Vertical and Offset Rotary Ditchers. Known for their toughness and reliability, our ditchers efficiently clean roadside ditches and direct water away from crops.
To help you use your AMCO Vertical or Offset Rotary Ditcher to its full potential, we have put together this short guide to hitching and operating these industry best-sellers.
HITCHING THE DITCHER
- Before backing the tractor in front of the ditcher, check the PTO shaft travel. It should slide forward freely without bottoming out.
- Lubricate the PTO shaft.
- Check the shearbolt.
- Make sure the tractor drawbar is moved to one side, is retracted, or is removed. Do not leave the drawbar in the middle of the tractor. This may cause damage to the PTO shaft.
- AMCO Ditchers will fit Category II and III 3-point hitches or Category II couplers. Connect the three tractor lift links to the ditcher with the connecting pins. The ditcher PTO shaft should be connected to the tractor PTO shaft by sliding the ditcher shaft forward until the quick disconnect pin slips into the groove on the tractor shaft. Use caution; the universal drive shaft could slip off the tractor PTO if the quick disconnect pin isn’t securely connected.
- Pin the parking stands in the raised position. Slowly raise and lower the ditcher to check its drive shaft length. At least 6″ of the shaft should be engaged in the tubular portion of the universal shaft drive. Check the shaft drive in the fully retracted position to make sure it will turn freely. Also check the drive shaft to make sure it won’t hit the tractor drawbar.
- Extend or retract the tractor’s top lift link until the chain case is vertical when lowered to the normal operating position. Also make sure the universal drive shaft has an equal offset in each joint.
CAUTION: If you notice that parts of the ditcher need to be lubricated or repaired before operation, disengage the tractor’s PTO and wait for the cutter head and cutting blades to come to a complete stop. Then, slowly lower the ditcher until the skid shoe touches the ground. Before dismounting, shut off the engine, set the parking brake, and remove the key.
Tip: Use the ditcher skid shoe to control the depth of your ditch.
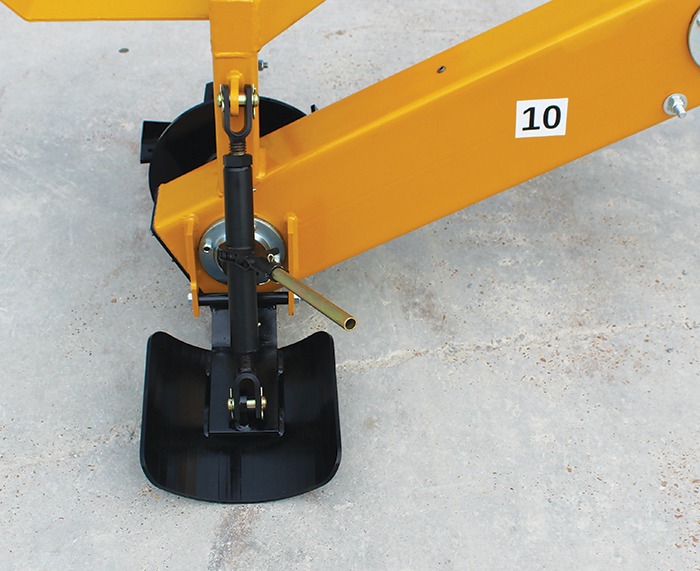
Concave skid shoe with quickadjust ratchet gives better tracking for a more uniform ditch. Standard on all models.
OPERATING THE DITCHER
- Before engaging the PTO, make sure the cutter head and cutting blades aren’t making contact with the soil.
- To start the ditcher, throttle the tractor engine speed to 250 RPMs. Then lower the ditcher until it rests slightly above the ground and engage the tractor PTO.
- After the cutter head has begun to rotate, set the engine speed to its designated RPM rating. Never operate the ditcher above its RPM rating; excessive PTO speed can cause personal injury and damage the equipment.
- If available, use the float position on the tractor’s 3-point lift. This feature will allow the skid shoe to control the depth of the cut.
- Slowly move the tractor forward while lowering the ditcher until it reaches the desired working depth. Base forward speed and depth on the soil condition.
- Raise the ditcher to clear the soil surface before making sharp turns or backing up. Never raise the ditcher to maximum height with the PTO engaged.
When hitched and operated correctly, AMCO’s Vertical and Offset Rotary Ditches deliver better ditch-clearing performance and durability. For more instructions on using and taking care of your AMCO Ditcher, review the operating manual or contact an AMCO tough tillage expert.
Visit the Vertical and Offset Rotary Ditchers page on our website to learn more about AMCO’s industry-leading tools.
Did You Know? For the best performance, operate your ditcher at 2.5-5 miles per. Ground speed will vary depending on the soil type, especially in extremely rocky conditions. A good rule of thumb for all conditions is the slower the ground speed, the better the ditcher will perform.