
 Before you take your terracing plow out for a spin this spring, you might want a brief refresher on proper terrace construction. The perfect narrow-base terrace is easy to achieve by following these steps
STEP 1. Begin to form the terrace by making one or two passes along the terrace centerline at 4 to 6 inches deep with both gangs set at 10 to 11 inches on the indicators.
Bonus tip: For best results, maintain tractor speed at or above 5 miles per hour. High speeds improve movement of soil upward and inward on the terrace, reducing construction time. With the AMCO Manufacturing Terracing Plow, you can build 1,000 feet of terraces or more per hour, working within Soil Conservation Service specifications.
STEP 2. Move soil into the base of the terrace from the area on each side by using only one gang. Lower the right-hand gang and operate the left-hand rear tractor tire just to the right of the terrace centerline. The gang should extend 4 to 6 feet beyond the furrow created by the outside disc blade on the previous pass. The tilt indicator should be set at about 11 or 12 inches.
Repeat 2 to 3 times on both sides of the terrace, moving soil inward into the base of the terrace. When soil has been worked inward to the point that the tractor is almost centered on the terrace, you’re ready for step 3.
Bonus tip: Occasionally use the left-hand gang in the opposite manner as just described so one gang doesn’t take more wear than the other.
STEP 3. With both gangs set at about 12 or 13 inches on the tilt indicators, further build and shape the terrace. Make several passes, increasing gang tilt about 1 to 1½ inches at each pass. Continue to build up the terrace until a full-tilt pass is completed. At this point, another pass or two with tilt set at 15 inches will generally help to smooth the side slopes and “crown off” the terrace.
Bonus tip: Tilt the gangs so that all blades are moving soil. If only one end of the gangs is cutting, increase or decrease gang tilt so that cutting is even all along the gang.
STEP 4. After the terrace is complete, in order to prepare the field for cropping and to ensure proper erosion control, it will likely be important to perform additional minor operations with the terracing plow or other equipment. For example, you may need to smooth and broaden the terrace channel and back slope furrow for cropping. This can also be done with a disc harrow or other equipment. Using the AMCO Terracing Plow or a blade, it may be necessary to tie the terrace channel into a waterway or do other finishing operations.
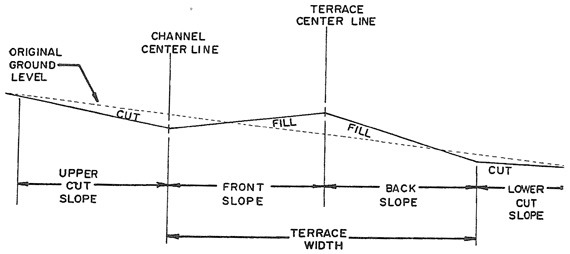
A diagram of proper terrace construction
Did you know?
AMCO Terracing Plows can also be used for broad-base terrace construction. Reference page 28 in our Terracing Plow manual for instructions. Tips to keep your Terracing Plow properly maintained can also be found on page 30 of the manual.
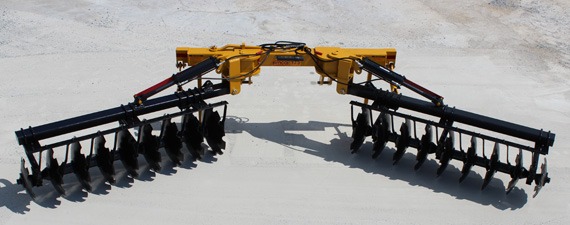
Visit our Terracing Plow page for more photos and features.